WinForm 自动更新程序(二)
|
admin 2023年2月27日 10:15
本文热度 2567
|
第二步理论上我们该写客户端了,但是,在此之前,需要先介绍下一些必要的方法以及操作。
写代码还是要尽量的保证通用性,以便以后需要的时候可以拿来稍微改改甚至直接使用。所以在这里我们将自动更新的程序抽象出来,即对于客户端来说,它只包含三个文件(Autoupdate.dll、Autoupdate.exe、updateList.xml,如果是.NET Framework的话,其实是没有Autoupdate.dll文件的,就一个exe就足够了。这也是我为什么一直不用NET Core来写Winform程序的原因之一);然后将这三个文件放到主程序的目录中即可。
然后就是传参调用,在Program文件中做了以下代码操作。所以调用的时候需要将主程序的执行目录以及进程名传过来,作用分别是再更新完后自动启动以及更新之前把相关的进程杀掉以便完成更新。
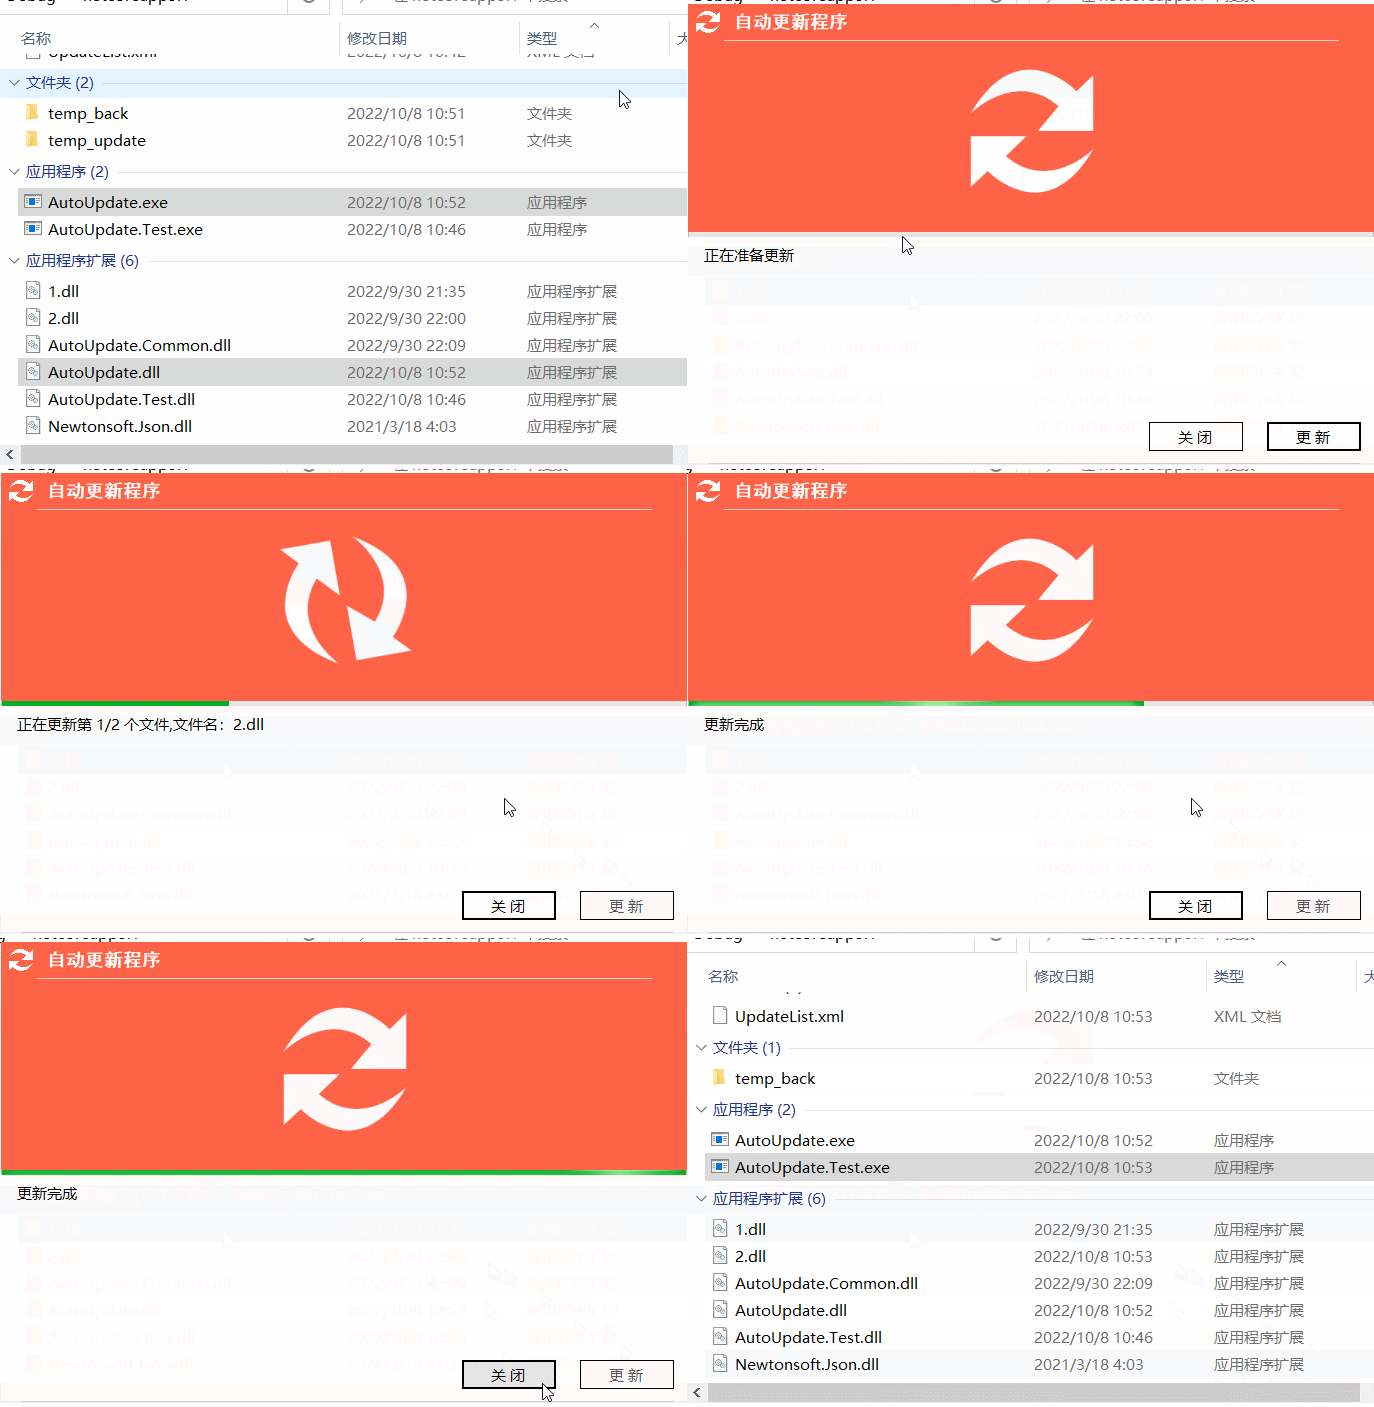
同时可以看到在更新的时候,有一个图片旋转的动作,也一并放到此篇文章中。
开发环境:.NET Core 3.1
开发工具: Visual Studio 2019
实现代码:
namespace Autoupdate { static class Program { [STAThread] static void Main(string[] args) { if(args.Length != 1) { return; } var arg = args[0].Split("|*|"); if(arg.Length == 0) { return; } string runPath = arg[0]; string procesName = arg[1]; Process[] processes = Process.GetProcesses(); foreach(Process process in processes) { if(process.ProcessName == procesName) { process.Kill(true); } } Application.SetHighDpiMode(HighDpiMode.SystemAware); Application.EnableVisualStyles(); Application.SetCompatibleTextRenderingDefault(false); Application.Run(new Form_update(runPath)); } }}
namespace Autoupdate.Test { static class Program { [STAThread] static void Main() {
update();
Application.SetHighDpiMode(HighDpiMode.SystemAware); Application.EnableVisualStyles(); Application.SetCompatibleTextRenderingDefault(false); Application.Run(new Form1()); }
readonly static string updateXml = Application.StartupPath + "updateList.xml"; static string GetupdateUrl() { XElement xele = XElement.Load(updateXml); string url = xele.Element("url").Value; return url; }
static string GetupdateFiles() { XDocument xdoc = XDocument.Load(updateXml); var files = from f in xdoc.Root.Element("files").Elements() select new { name = f.Attribute("name").Value, version = f.Attribute("version").Value }; return JsonConvert.SerializeObject(files); }
static bool Checkupdate() { string url = GetupdateUrl(); HttpResult httpResult = HttpUtil.HttpRequest(new HttpItem(url + "GetupdateFiles", requestData: GetupdateFiles())); if(httpResult.Status) { updateModel_Out output = JsonConvert.DeserializeObject<updateModel_Out>(httpResult.HttpStringData);
if(output.updateList.Count > 0) return true; } return false; }
static void update() { if(Checkupdate()) { string processName = Assembly.GetexecutingAssembly().GetName().Name;
ProcessStartInfo info = new ProcessStartInfo(Application.StartupPath + "Autoupdate.exe", Process.GetCurrentProcess().MainModule.FileName + "|*|" + processName); Process.Start(info); Environment.Exit(0); } } }}
public static class ImageEx { public static Image RotateImage(this Image image, float angle) { if(image == null) throw new ArgumentNullException("image"); float dx = image.Width / 2.0f; float dy = image.Height / 2.0f;
Bitmap rotatedBmp = new Bitmap(image.Width, image.Height); rotatedBmp.SetResolution(image.HorizontalResolution, image.VerticalResolution);
Graphics g = Graphics.fromImage(rotatedBmp); g.TranslateTransform(dx, dy); g.RotateTransform(angle); g.TranslateTransform(-dx, -dy); g.DrawImage(image, new PointF(0, 0));
g.Dispose(); return rotatedBmp; } }
实现效果:

代码解析:这里可以关注下在主程序中的获取更新地址以及文件等方法,其实我这里是有重复判断的,即在主程序中判断了一遍,还会在更新程序中判断一遍,如果觉得不需要,可以执行选择去掉,全部交给更新程序去做。但是也就需要统一放在更新程序的入口中做处理了,相对而言,我觉得写两遍还是很方便。
该文章在 2023/2/27 10:15:34 编辑过